Backpacking Gear Checklist:10 Top Tips for Budget-Friendly Adventures

Excited to hit the trail but worried about blowing your budget? Planning the perfect backpacking trip can feel like a lot, especially if you’re new.
The good news? Amazing adventures should not cost a fortune. With a little strategy and the right backpacking gear checklist, you can explore beautiful trails without overspending.
From must-have essentials to clever money-saving tips, this guide will equip you for a safe and unforgettable journey.
Ready? Let’s make your next adventure simple, affordable, and full of memories!
Backpacks: Your Travel Companion
Choosing the perfect backpack can make or break your adventure. It’s about comfort, durability, and ensuring every essential has its spot.
The right backpack becomes your dependable sidekick even if you’re trekking through mountain passes or hopping on budget flights,
1. Choose the Right Backpack
Your backpack is your portable home for the trip. When choosing one, focus on size, weight, and durability. A good rule of thumb?
Match the backpack size to your trip’s length. For short 3-day trips, a 35-50L pack might suffice. For longer excursions, go for something in the 60-80L category.
But don’t go overboard—bigger isn’t always better if it means filling it with unnecessary items!
Weight matters too. Look for lightweight options to ease the strain, especially if you plan to walk a lot. Comparing materials like nylon or ripstop fabric can also help in durability—these can handle the bumps, scrapes, and even a little rain.
Budget-friendly doesn’t mean compromise!
Check out options reviewed in the lightweight backpacks review to find durable and cost-effective packs tested for avid travelers.
Finally, try it on if possible. The fit matters. Adjustable straps, padded hip belts, and quality zippers make a world of difference after hours on the trail!
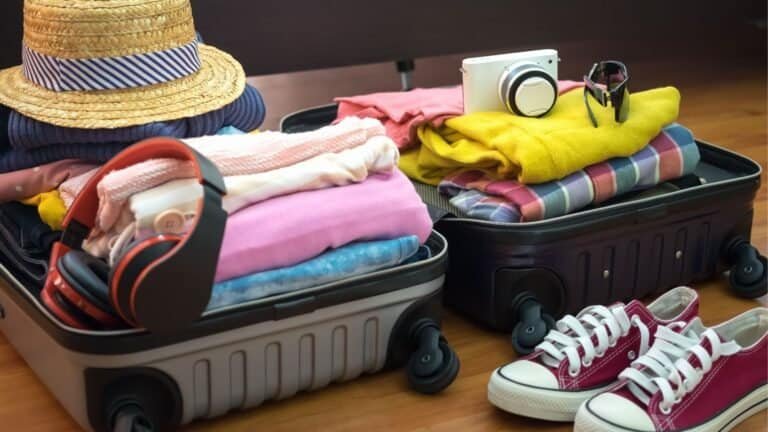
2. Pack Smart: Essentials Only
Packing is where things often go sideways, especially for first-time backpackers. It’s tempting to load your pack with “what if” items, but overpacking is a rookie mistake.
Why carry a “just in case” sweatshirt if it’ll never leave your bag?
Start with necessities:
- Clothing: Stick to layers and versatile pieces. Include a weather-appropriate jacket, a couple of t-shirts, and a pair of pants that work for hiking and lounging.
- Essentials like a first aid kit are non-negotiable. You’ll thank yourself later for being prepared.
- Toiletries in mini-size: Think toothpaste, soap, and sunscreen—but travel-sized!
- Lightweight food options: Instant noodles or dried fruits can save space and weight without sacrificing nourishment.
The goal? Pack smart, not heavy. Use packing cubes or compression bags to stay organized. Think of your backpack as prime real estate and every item as a tenant proving its worth.
Need an extra tip? Lay everything out beforehand and ask yourself, “Do I really need this?” More often than not, you won’t.
Slimming down to essentials enables you ease the physical burden and also save money. How? Overpacked bags often mean higher fees on planes or extra storage needs during your journey.
For more expert backpacking tips on gearing up without overspending, there’s no better starting place than the backpacking on a budget guide.
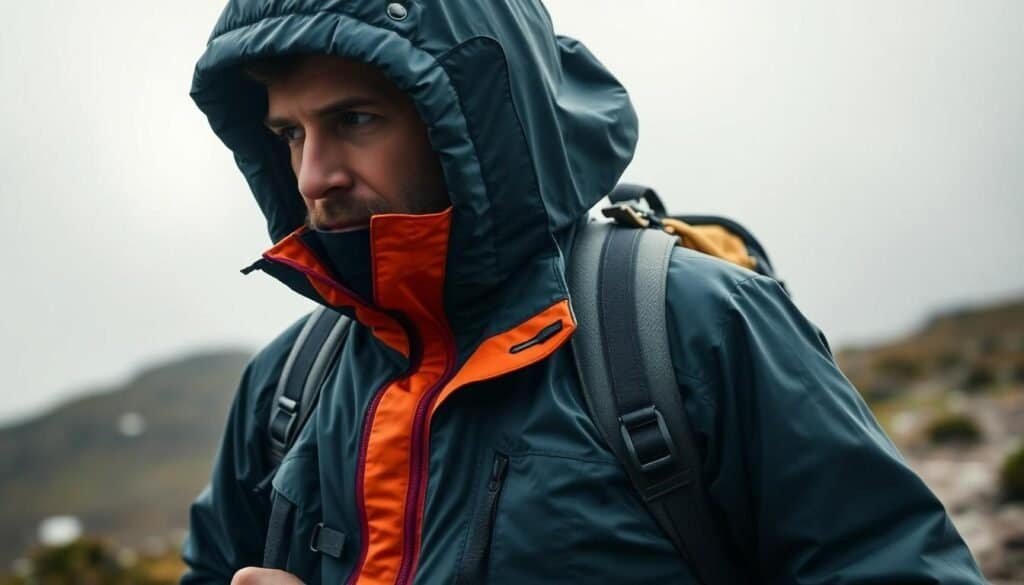
3. Clothing Checklist for Any Weather
Weather can turn on a dime, especially when you’re out in the wilderness. Packing for multiple conditions ensures you’re never caught off guard.
Here’s how to prepare for any climate:
- Waterproof jacket: When it rains, it pours. A lightweight rain jacket is your best friend. Make sure it’s packable and breathable—bonus points if it doubles as a windbreaker.
- Thermal layers: Unexpected cold snap? Thermal layers, like a merino wool base or fleece, can keep you warm without weighing you down. This is especially useful for chilly evenings and early mornings.
- Sun protection: Don’t underestimate the sun. Wide-brim hats, lightweight long-sleeve shirts, and UV-resistant fabrics help you avoid overexposure while staying cool. Don’t forget sunscreen for extra protection.
Through layering smartly, you can adapt to whatever comes your way. Layering also keeps your pack lighter because you can mix and match instead of carrying bulky items for different conditions.
4. Shoes That Work for Every Occasion
Your footwear is a major commitment. Poor shoe choices cause discomfort and can ruin the most exciting trek. Luckily, you don’t need a suitcase full of options—just one or two well-chosen pairs.
- Hiking boots or trail runners: These are a must if you plan to tackle rugged paths or steep inclines. Aim for waterproof models that offer good arch support.
- Simple sandals: Perfect for leisure days or walking around camp. They’re lightweight and won’t take up much space.
Need to stick to a budget? Versatility is the name of the game. Shoes that work for hiking, casual wear, and camp life let you carry less without losing functionality.
5. Sleeping Gear: Budget-Friendly Options
Buying sleeping gear doesn’t mean you need to overhaul your bank account. Affordable and reliable options are out there if you know where to look!
- Secondhand Wonders: Check apps like Facebook Marketplace or dedicated outdoor gear resale platforms such as Geartrade or REI’s Used Gear site. These marketplaces sometimes carry high-end branded sleeping bags or pads that have barely been used.
- Seasonal Sales: Keep an eye out during end-of-season sales. Outdoor retailers like REI offer impressive discounts, especially as summer backpacking winds down or winter camping gear is phased out.
- Budget Brands, High Returns: Don’t underestimate brands like Ozark Trail or Kelty—you can snag decent sleeping bags or mattresses for a fraction of boutique prices.
- Local Rentals: Planning a one-off trip? Consider renting gear instead. Outdoor retailers and even some local parks offer quality setups at low costs, saving you the hassle of ownership.
Affordable sleeping systems can be found everywhere if you’re patient and strategic. Remember, paying less doesn’t have to mean suffering through a chilly, uncomfortable night.
6. Compact and Lightweight Options
If there’s one golden rule of backpacking, it’s this: pack light, sleep tight. Portability is a necessity. Lugging around a bulky, heavy sleeping system can zap your energy faster than a rocky trail.
- Down vs. Synthetic: When choosing a sleeping bag, consider the insulation fill. Down is generally lighter and more compressible. Synthetic options, while bulkier, come at a lower price and handle damp conditions better. Many budget backpackers stick to synthetics for their affordability and durability against moisture.
- Multipurpose Gear: Some sleeping pads double as seating or insulated barriers, making them extra valuable. Options like these not only save space but offer versatility that’s perfect for long treks.
- Compression Bags: Most sleeping bags can be stuffed down further with a simple compression sack, turning bulk into a neat, manageable size.
- Sizes Matter: Whether small ultralight pads or petite-sized bags—pick dimensions that match you. Overkill sizes might seem tempting but become dead weight during long walks.
Compact, lightweight gear keeps you focused on what truly matters: the adventure.
Through prioritizing packable and affordable sleeping setups, you’ll enjoy nights under the stars without carrying the weight of the world.
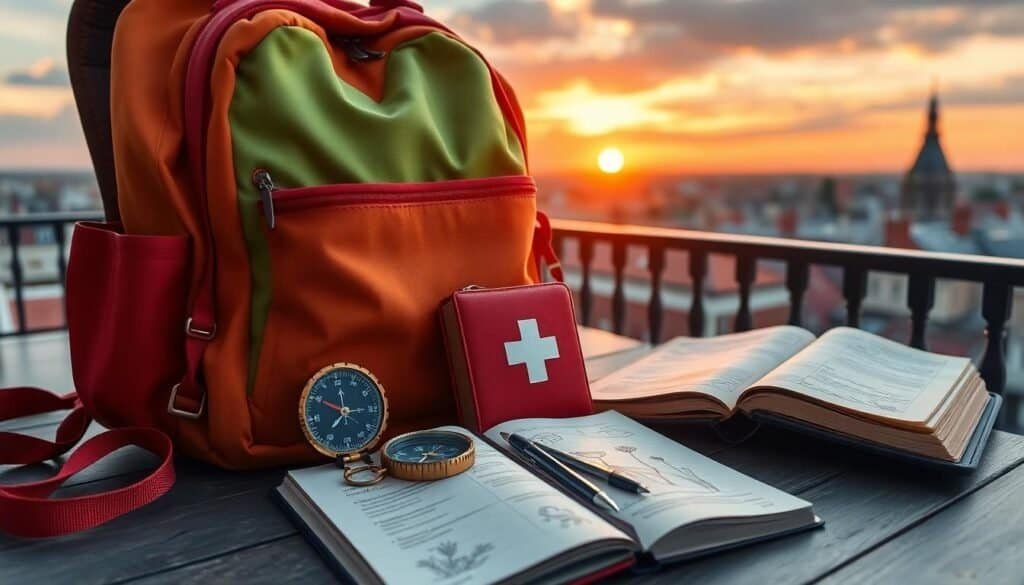
7. First Aid Kit Essentials
When you’re miles from the nearest clinic, your first aid kit is your lifeline. You’ll want a lightweight and compact kit that still covers the basics.
Here’s a quick checklist of what your kit should include:
- Adhesive bandages in various sizes for small cuts and scrapes.
- Antiseptic wipes or a small tube of antibiotic ointment to prevent infections.
- Pain relievers like ibuprofen to handle headaches or muscle aches.
- Sterile gauze pads and medical tape for larger wounds.
- Tweezers to remove splinters or ticks.
- A signal whistle in case you need to attract attention or call for help.
- Basic medications like antihistamines for allergic reactions or anti-diarrheal tablets for stomach upsets.
Make safety simple and effective. For more insights on building your travel-first aid kit, check out this backpacking guide to first-aid essentials. Trust me, you’ll sleep better knowing you’re prepared!
8. Budget Gadget Recommendations
Backpacking doesn’t require flashy gear—just clever, economical choices that get the job done. When hunting for budget-friendly tools, focus on items that are not just cheap but also durable and practical.
Here are a few solid options:
- Foldable Stoves: Compact, lightweight, and usually priced under $50, foldable stoves like the Esbit or Soto Amicus are game changers for cooking on a budget. Small fuel tablets or canisters can last you several days, ensuring you enjoy warm meals without over-packing.
- Reusable Utensils: Toss the flimsy plastic-ware in favor of reusable titanium utensils or sporks. They’re lightweight, eco-friendly, and dishwasher-safe—perfect for the long haul.
- Portable Water Purifiers: While a good purifier can be an upfront investment, budget options like the Sawyer Mini or LifeStraw help you save by cutting the need to buy bottled water during your trip.

9. Budget-Friendly Meal Prep: Non-Perishable and Easy-to-Cook Options
When you’re out on the trail, meal prep needs to be simple, easy to store, and lightweight. Here are a few excellent food options that won’t break the bank or weigh you down:
- Instant Noodles or Rice: Forget fancy dinners—instant noodles and minute rice are compact, lightweight, and affordable, making them perfect for backpacking. You can even elevate your meal by adding dehydrated vegetables, which take up minimal space.
- Oatmeal Packets: Perfect for breakfast. These take seconds to prepare with hot water and come in many flavors to keep mornings interesting.
- Trail Mix and Energy Bars: Stock up on bulk nuts, dried fruit, and chocolate to make your own. It’s cheaper in the long run, and you can control how much sugar or carbs you’re consuming.
- Canned Fish or Packaged Tuna: High in protein and ridiculously easy to carry. These serve as a no-fuss meal option or protein boost when mixed into instant noodles or rice dishes.
Need more ideas for affordable, yet nutritious meals? Check out these 10 affordable and healthy meal prep ideas. Trust me, smart planning makes meal prep an adventure in itself!
10. Portable Water Solutions: Purification Tablets and Collapsible Bottles
Water is the one thing you absolutely cannot compromise on, but carrying liters of it isn’t practical. Here’s how to keep hydrated without the bulk:
- Water Purification Tablets: These are lifesavers—literally. Compact and lightweight, purification tablets are great for turning questionable water sources like streams into drinkable reserves. They’re also a fantastic backup if your main water filtration system fails.
- Collapsible Water Bottles: Regular water bottles are bulky when empty, but collapsible bottles save space when they’re not filled. This makes them ideal for backpacking trips, plus you can pack several without extra weight.
For more tips on keeping hydrated efficiently, consider investing in a good mix of lightweight hydration tools. You’ll find that staying hydrated on the trail has never been more convenient or affordable.
11. Stay Organized: Packing Tips
Backpacking is about adventure, but if your gear’s a mess, it can feel more like a chore than a journey. Trust me, nothing kills the mood faster than digging through your backpack for sunscreen when you’re already halfway up a trail.
Staying organized ensures you’re prepared, safe, and able to enjoy every step. Let’s dive into some tried-and-true strategies to keep your gear in order.
Packing Cubes vs. Roll Packing: Maximize Your Backpack Space
Packing your bag is a bit like solving a puzzle—every piece has to fit just right. Two popular techniques for efficient packing are packing cubes and roll packing, and both have their merits.
So, what’s the best choice? Well, that depends on your style and needs.
Packing Cubes: These handy rectangular pouches are a lifesaver for anyone who loves structure. With packing cubes, you can separate your items by category—clothing, toiletries, electronics—making everything easy to find. No more pulling out everything just to grab your water filter!
They’re also fantastic for compressing items, which allows you to save extra space.
Here’s why they work: They act like dresser drawers for your bag, keeping everything tidy and in its rightful place. If you’re carrying a mix of bulky jackets and tiny items like socks, packing cubes prevent the chaos.
Roll Packing: Prefer to skip the extra weight of cubes? Roll packing is your new best friend. Rolling your clothes—rather than folding them—minimizes wrinkles and maximizes every inch of your pack.
This trick is especially great for backpacks without multiple compartments.
Bonus tip: Use a combination of both methods. Pack larger pieces using roll packing and stash smaller, easy-to-lose items in a cube.
Quick Access Essentials: Keep Important Items Within Reach
When you’re mid-hike and need something fast, the last thing you want is to scramble through layers of clothing and gear. That’s where strategic placement comes in.
Start with the “quick access” rule: Critical items should always be in external or top compartments for easy grabbing. Think of items like:
- Navigation tools: Maps, GPS devices, or trail notes should be quickly reachable—because who wants to guess directions at a crossroads?
- First aid kit: Always keep it handy. Emergencies don’t wait, and having supplies stashed deep in your bag could cost you precious time. Need inspiration for building your kit? Check out this first-aid essentials guide.
- Snacks: Energy bars or trail mix guarantee you’re fueled up when hunger strikes unexpectedly. Store these in waist pockets or the top lid of your pack for easy access.
- Rain gear: Whether it’s a poncho or a packable shell, always have rain protection ready when skies turn gray.
Divide your pack into zones—the bottom for sleeping gear, the middle for heavy items like food, and the top or outer pockets for quick-access essentials. This method keeps everything balanced while ensuring you’re not digging unnecessarily.
Your backpack is only as useful as its accessibility!
With these tips, your load stays lightweight, efficient, and easy to handle—crucial for any backpacking adventure!
Final Thoughts – Backpacking Gear Checklist – 10 Top Tips
Backpacking is all about the balance—packing wisely and choosing gear that suits your needs without blowing your budget.
The right backpacking gear checklist ensures you’re equipped for adventure, comfortable, and ready for whatever nature throws your way.
From lightweight packing hacks to budget-friendly essentials, the possibilities are endless when you’ve got the right tools and mindset.
For even more packing tips, check out this REI expert advice on what to wear backpacking. They’re packed with actionable tips tailored for adventurers.
Now it’s your turn! Use these tips as a guide, and don’t forget to explore more ways to save on your journey with backpacking on a budget.
Ready to hit the trail? Share your own experiences, tips, or must-have gear with the Tripping Eagle community—because great adventures are even better when we learn and share together.
Love what you see? Subscribe and share this post with fellow travelers or pin it on Pinterest. Let’s inspire even more adventurers to pack smart, travel light, and budget right!